
YOLOv8 Video Object Detection Based on OK-MX9596-C (Linux 6.12) and ARA240 AI Accelerator
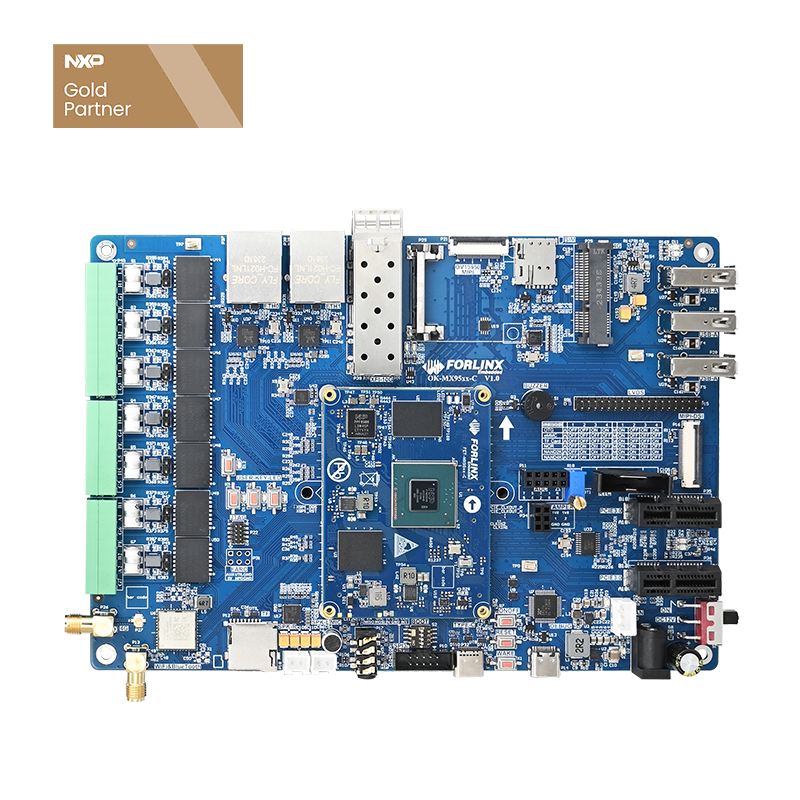
This article demonstrates how to run the FAI-ARA240-M ai accelerator module on the Forlinx OK-MX9596-C development board. The demonstration will use the yolov8n-gstreamer-ara2 model provided by NXP as an example.
Hardware Preparation
The hardware prepared for this test includes:
During testing, the ARA240 ai accelerator and M.2 adapter board should be inserted into the PCIe 3.0 slot of the OK-MX9596-C development board.
The final setup is shown in the diagram below:
Powering Up and Startup
Connect the development board to a 12V power supply. Then, connect the DEBUG port on the OK-MX9596-C carrier board to a computer using a Type-C data cable. Afterward, four additional serial port devices can be seen in the computer’s Device Manager.
Open Serial Port A (e.g., COM48) for debugging. Configure the serial terminal with the following settings:
Baud rate: 115200
Data Bits: 8
Stop Bits: 1
No parity bit
No-flow control
Once it has successfully logged in to the serial terminal, use the following command to check whether the computing power card module has been recognised.
root@ok-mx95-c:~# lspci
See the following output:
0001:01:00.0 Processing accelerators: Device 1e58:0002 (rev 02)
At this point, it indicates that the development board has successfully recognized the ai accelerator module. However, so far, only the PCIe device has been detected, and the ai accelerator cannot yet be used normally. Please further configure the software environment to enable the OK-MX9596-C development board to properly operate the ARA240 ai accelerator.
Environment Deployment
The following software packages are required. These files can be obtained from the official NXP website and are all official open-source packages.
rt-sdk-ara2.deb.
yolov8n-gstreamer-ara2.deb
Before proceeding with the deployment, please first configure the development board’s network settings to enable access to the external network, as this will involve downloading files over the internet later on:
// Set the IP address and subnet mask root@ok-mx95-c:~# ifconfig eth1 10.10.19.216 netmask 255.255.255.0
// Set the default gateway root@ok-mx95-c:~# route add default gw 10.10.19.254
// Configure DNS root@ok-mx95-c:~# echo "nameserver 222.222.202.202" > /etc/resolv.conf
// Test external network connectivity root@ok-mx95-c:~# ping www.baidu.com -c 3
PING www.a.shifen.com (124.237.178.212) 56(84) bytes of data.
64 bytes from 124.237.178.212: icmp_seq=1 ttl=54 time=1.77 ms
64 bytes from 124.237.178.212: icmp_seq=2 ttl=54 time=1.56 ms
64 bytes from 124.237.178.212: icmp_seq=3 ttl=54 time=1.65 ms
--- www.a.shifen.com ping statistics ---
3 packets transmitted, 3 received, 0% packet loss, time 2014ms
rtt min/avg/max/mdev = 1.561/1.658/1.765/0.083 ms
Deploy rt-sdk-ara2
Copy the rt-sdk-ara2.deb file to the development board’s file system. There are many ways to copy files, such as via a TF card, USB or SCP; here, upload them to the development board’s file system via an SFTP server.
Once the copying is complete, use the following command to install the package:
root@ok-mx95-c:~# dpkg -i rt-sdk-ara2.deb
As shown below, this indicates that the installation was successful and that the rt-sdk-ara2.service service has been created.
Once the installation is complete, a “kinara” directory will be created in the home directory, containing a “driver” subdirectory which holds various driver and module files.
Please not that the operation of “rt-sdk-ara2.service” depends on the successful loading of the driver modules mentioned above. However, as the uiodma.ko file provided in the official installation package is not compatible with the OK-MX9596-C’s current kernel version, it cannot be loaded directly by the system.
Please extract these files and place them in the OK-MX9596-C development environment, then compile them separately within the relevant kernel source code. Once compilation is complete, copy them back to the corresponding directory in the development board’s file system, where you will find the following files:
Afterwards, restart the development board; if you see the following boot messages, this indicates that the deployment was successful.
Use the following command to check the service status and background processes.
root@ok-mx95-c:~# dpkg -i rt-sdk-ara2.deb
root@ok-mx95-c:~# ps -eaf|grep proxy
Deploying yolov8n-gstreamer-ara2
Copy the “yolov8n-gstreamer-ara2.deb” file to the development board’s file system. There are many ways to copy files, such as via a TF card, USB or SCP; here, upload them to the development board’s file system via an SFTP server.
Once the copying is complete, use the following command to install the package:
root@ok-mx95-c:~# dpkg -i yolov8n-gstreamer-ara2.deb
As shown below, this indicates that the installation was successful.
Once the installation is complete, run the following command to download the YOLOv8n model.
root@ok-mx95-c:~# run_model_download.sh
Install the software by following the steps below:
The software environment deployment is now complete, and AI model testing can proceed.
4. Demonstration
The model demonstrated here is yolov8n, a vision model. For this demo, use Forlinx 10.1-inch LVDS screen as the display module.
The model demonstrated here is yolov8n, a vision model. This demonstration uses Forlinx’s 10.1-inch LVDS screen as the display module.
Single-Stream Display
First, preview one of the original videos using GStreamer with the following command:
root@ok-mx95-c:~# gst-launch-1.0 -v filesrc location=/usr/share/test_video/video_0.mp4 ! h264parse ! v4l2h264dec ! waylandsink
Then use the following command to run the YOLOv8n test demo, specifying single-channel display.
root@ok-mx95-c:~# run_yolov8n_ara2 -s 1
Multi-Stream Display
Four-Stream Display
First, look at the preview of the four original video feeds. The command is as follows:
root@ok-mx95-c:~# gst-launch-1.0 \
compositor name=comp \
sink_0::xpos=0 sink_0::ypos=0 \
sink_1::xpos=640 sink_1::ypos=0 \
sink_2::xpos=0 sink_2::ypos=400 \
sink_3::xpos=640 sink_3::ypos=400 \
! waylandsink \
filesrc location=/usr/share/test_video/video_0.mp4 ! h264parse ! v4l2h264dec ! videoscale ! video/x-raw,width=640,height=400 ! comp.sink_0 \
filesrc location=/usr/share/test_video/video_1.mp4 ! h264parse ! v4l2h264dec ! videoscale ! video/x-raw,width=640,height=400 ! comp.sink_1 \
filesrc location=/usr/share/test_video/video_2.mp4 ! h264parse ! v4l2h264dec ! videoscale ! video/x-raw,width=640,height=400 ! comp.sink_2 \
filesrc location=/usr/share/test_video/video_3.mp4 ! h264parse ! v4l2h264dec ! videoscale ! video/x-raw,width=640,height=400 ! comp.sink_3
Then use the following command to run the YOLOv8n test demo, specifying single-channel display.
root@ok-mx95-c:~# run_yolov8n_ara2 -s 4
Eight-Stream Display
First, preview the original eight video streams with the following command:
root@ok-mx95-c:~# gst-launch-1.0 \
compositor name=comp \
sink_0::xpos=0 sink_0::ypos=0 \
sink_1::xpos=320 sink_1::ypos=0 \
sink_2::xpos=640 sink_2::ypos=0 \
sink_3::xpos=960 sink_3::ypos=0 \
sink_4::xpos=0 sink_4::ypos=400 \
sink_5::xpos=320 sink_5::ypos=400 \
sink_6::xpos=640 sink_6::ypos=400 \
sink_7::xpos=960 sink_7::ypos=400 \
! waylandsink \
filesrc location=/usr/share/test_video/video_0.mp4 ! h264parse ! v4l2h264dec ! videoscale ! video/x-raw,width=320,height=400 ! comp.sink_0 \
filesrc location=/usr/share/test_video/video_1.mp4 ! h264parse ! v4l2h264dec ! videoscale ! video/x-raw,width=320,height=400 ! comp.sink_1 \
filesrc location=/usr/share/test_video/video_2.mp4 ! h264parse ! v4l2h264dec ! videoscale ! video/x-raw,width=320,height=400 ! comp.sink_2 \
filesrc location=/usr/share/test_video/video_3.mp4 ! h264parse ! v4l2h264dec ! videoscale ! video/x-raw,width=320,height=400 ! comp.sink_3 \
filesrc location=/usr/share/test_video/video_4.mp4 ! h264parse ! v4l2h264dec ! videoscale ! video/x-raw,width=320,height=400 ! comp.sink_4 \
filesrc location=/usr/share/test_video/video_5.mp4 ! h264parse ! v4l2h264dec ! videoscale ! video/x-raw,width=320,height=400 ! comp.sink_5 \
filesrc location=/usr/share/test_video/video_6.mp4 ! h264parse ! v4l2h264dec ! videoscale ! video/x-raw,width=320,height=400 ! comp.sink_6 \
filesrc location=/usr/share/test_video/video_7.mp4 ! h264parse ! v4l2h264dec ! videoscale ! video/x-raw,width=320,height=400 ! comp.sink_7
Then use the following command to run the YOLOv8n test demo, specifying eight-stream display.
root@ok-mx95-c:~# run_yolov8n_ara2 -s 8
This completes the entire process of running the FAI-ARA240-M ai accelerator on the OK-MX9596-C development board.